Community Trading Analysis & Chart Ideas
Explore Market Insights · Technical Analysis · Trading Ideas
Discover trading ideas from the GoCharting community
 neutral
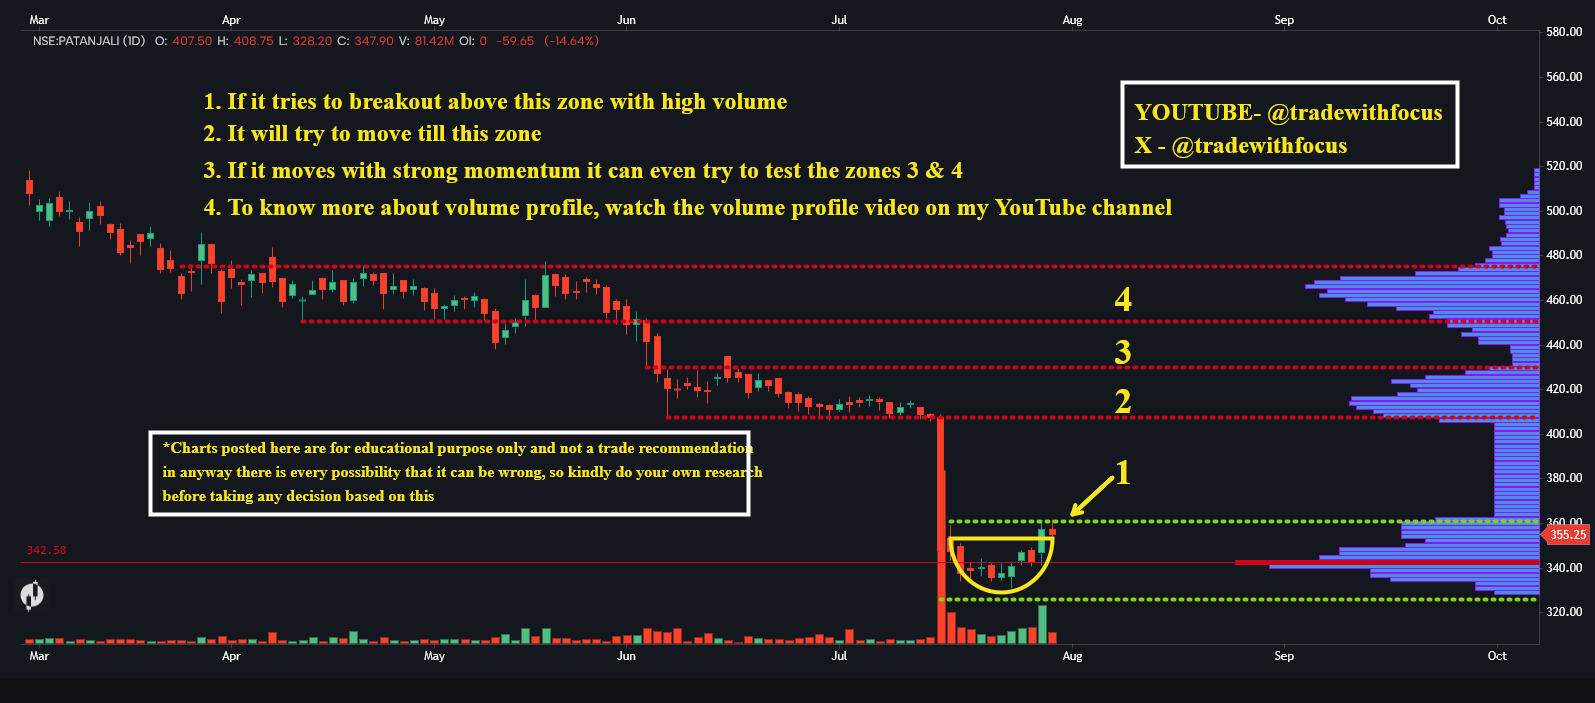
 PATANJALI
VOLUME PROFILE
Click this link now to watch the volume profile video on my YouTube channel https://youtu.be/t_wsMD_lcSs

 Bullish
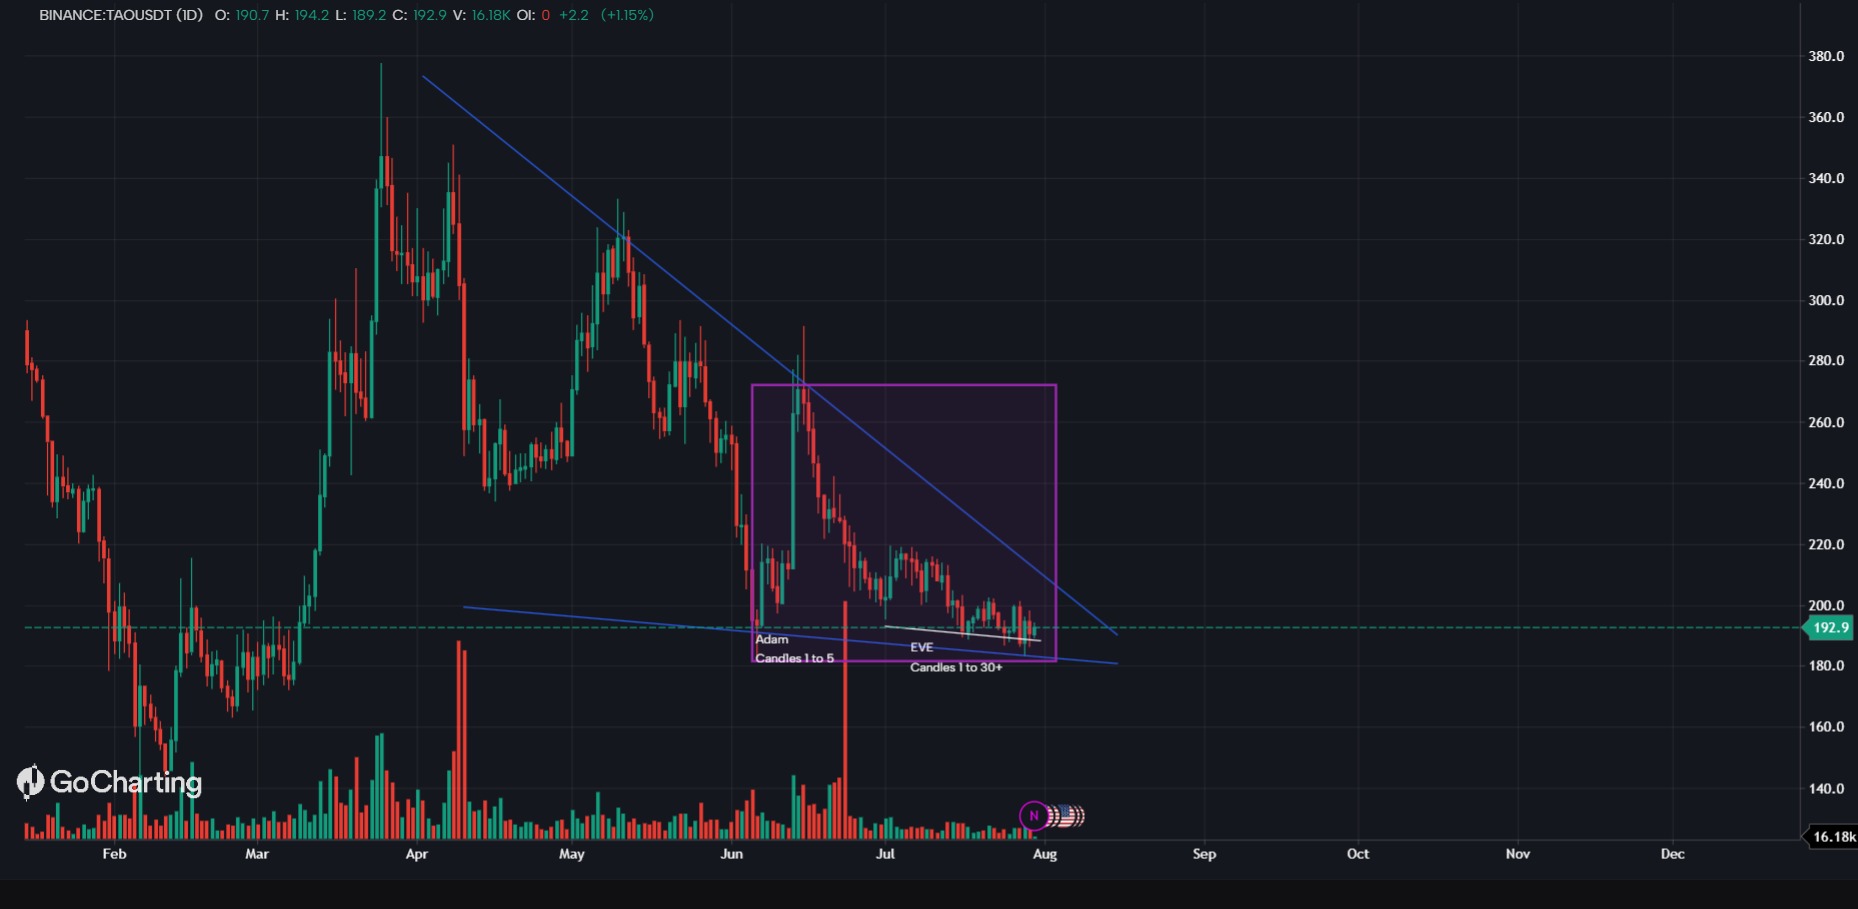
 TAOUSDT
TAO Eyes a Strong Breakout as Adam & Eve Nears Completion
TAO is currently forming an Adam & Eve pattern on the daily timeframe. The Eve portion appears to be nearly complete, and if the pattern confirms with a breakout, it could lead to a significant upside move in the coming days 📣

 neutralMEDPLUS
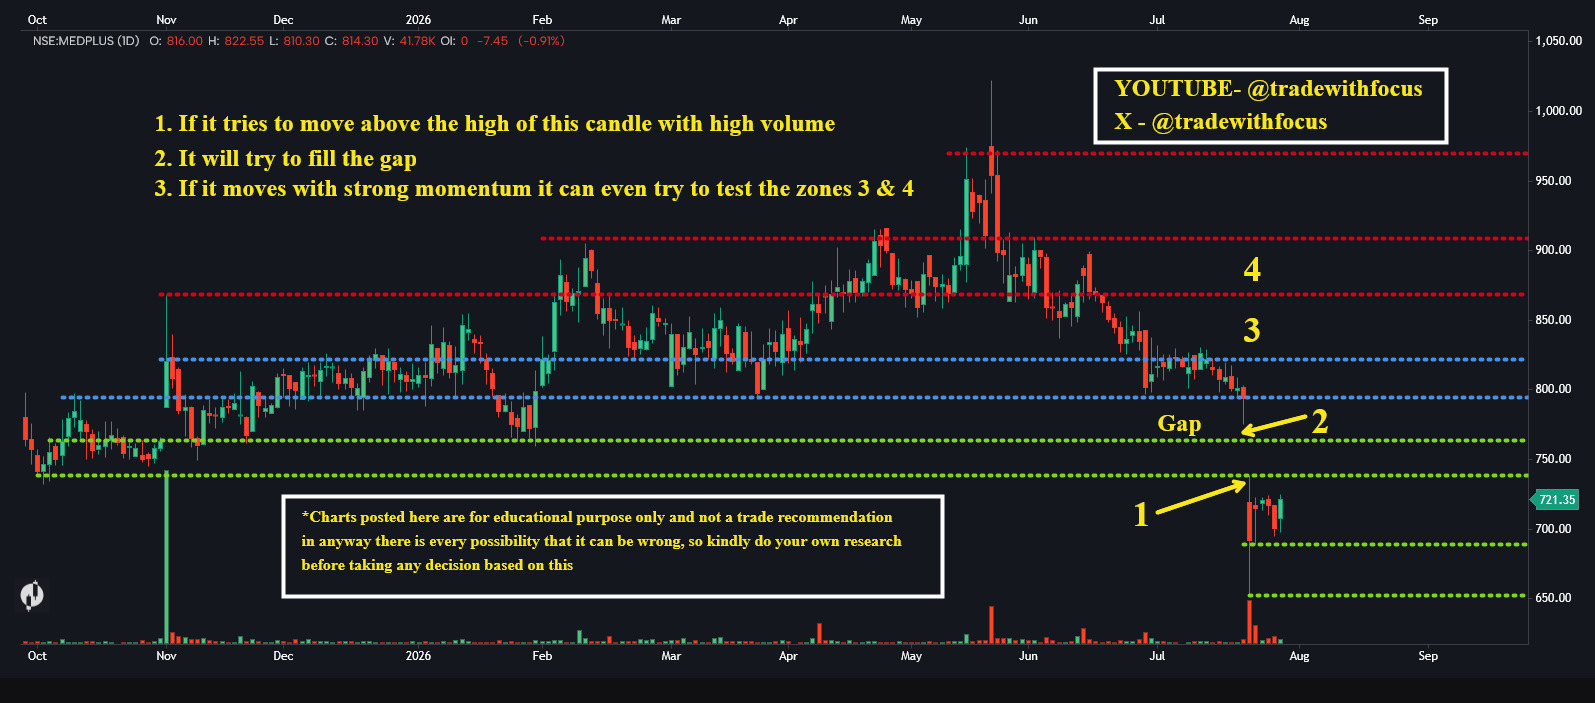
GAP
1. If it tries to move above the high of this candle with high volume 2. It will try to fill the gap 3. If it moves with strong momentum it can even try to test the zones 3 & 4
 Bearish
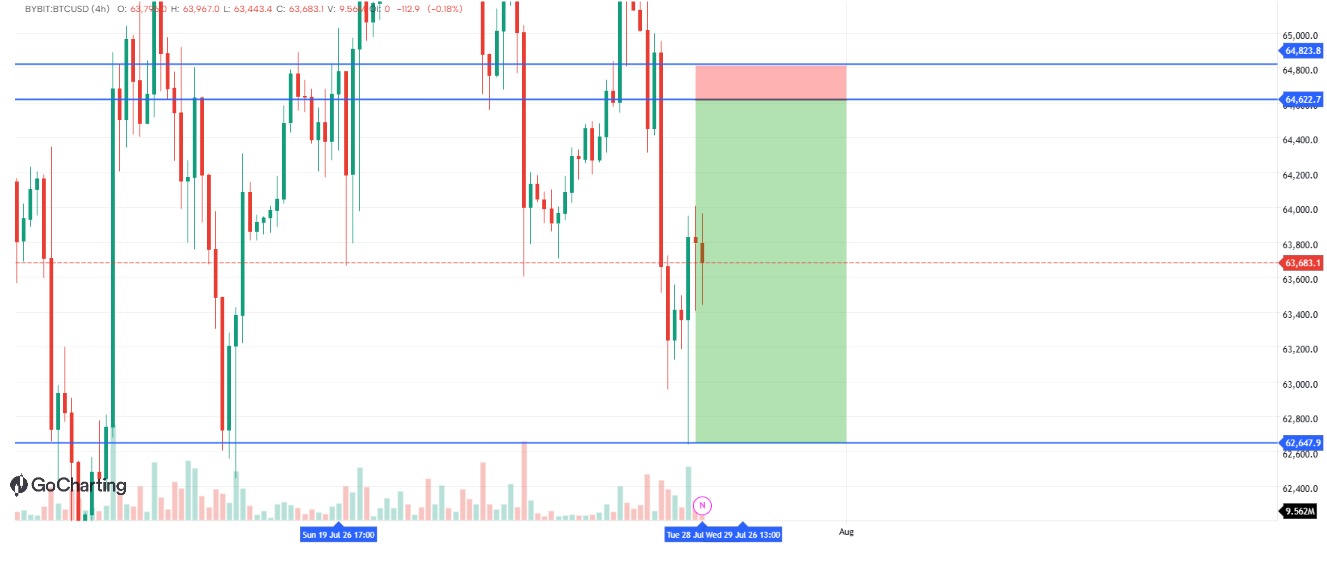
 BTCUSD
SNIPER BEARISH POI IF YOU GOT BALLS HERES THE DICE
MY ANALYSIS IS BASED ON LTT ABT AND HTG ALLIGNMENT WHATSAPP ME IF YOU WANNA LEARN $5,000 FOR THIS ONLY 1 PERCENT TRADERS KNOW IT +2348064383472

 neutralHINDUNILVR
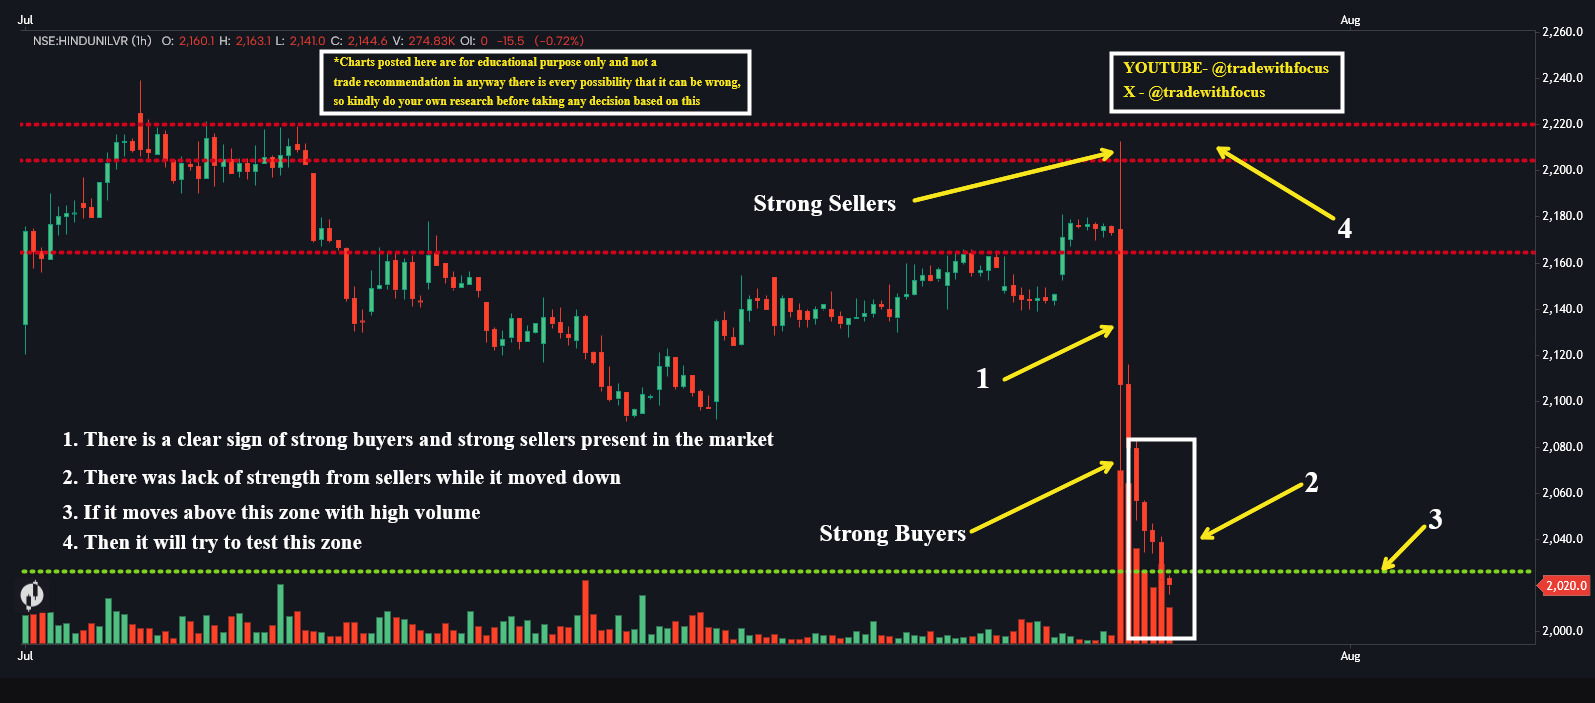
SHAKEOUT
1. There is a clear sign of strong buyers and strong sellers present in the market 2. There was lack of strength from sellers while it moved down 3. If it moves above this zone with high volume 4. Then it will try to test this zone
 BullishBTCUSD
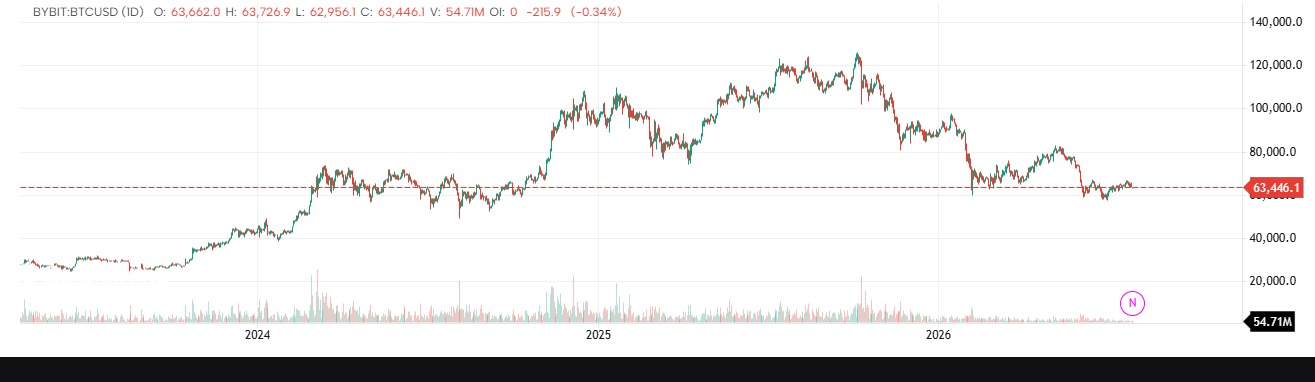
Weekly BB Lower → Monthly BB Upper
Strategy Logic Entry Buy when price touches the Weekly Bollinger Band Lower Band (red line). Exit Sell when price touches the Monthly Bollinger Band Upper Band (green line). Recommended Settings Length = 20 Std Dev = 2.0 Use previous completed Weekly/Monthly candles (non-repainting)

 neutralBANDHANBNK
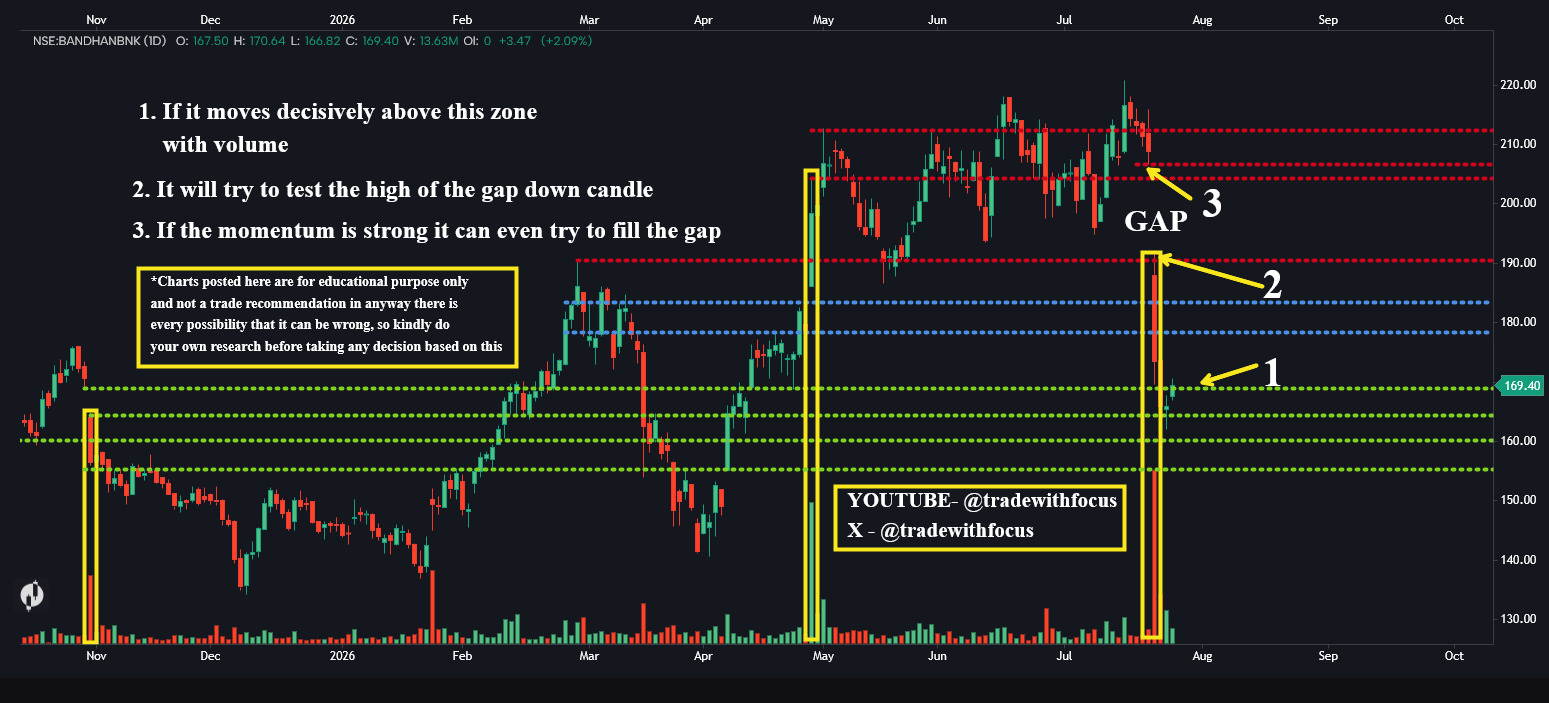
GAP
1. If it moves decisively above this zone with volume 2. It will try to test the high of the gap down candle 3. If the momentum is strong it can even try to fill the gap
 BTCUSD
market structure by sara
to analysis the market structrue with target

 XAUUSD
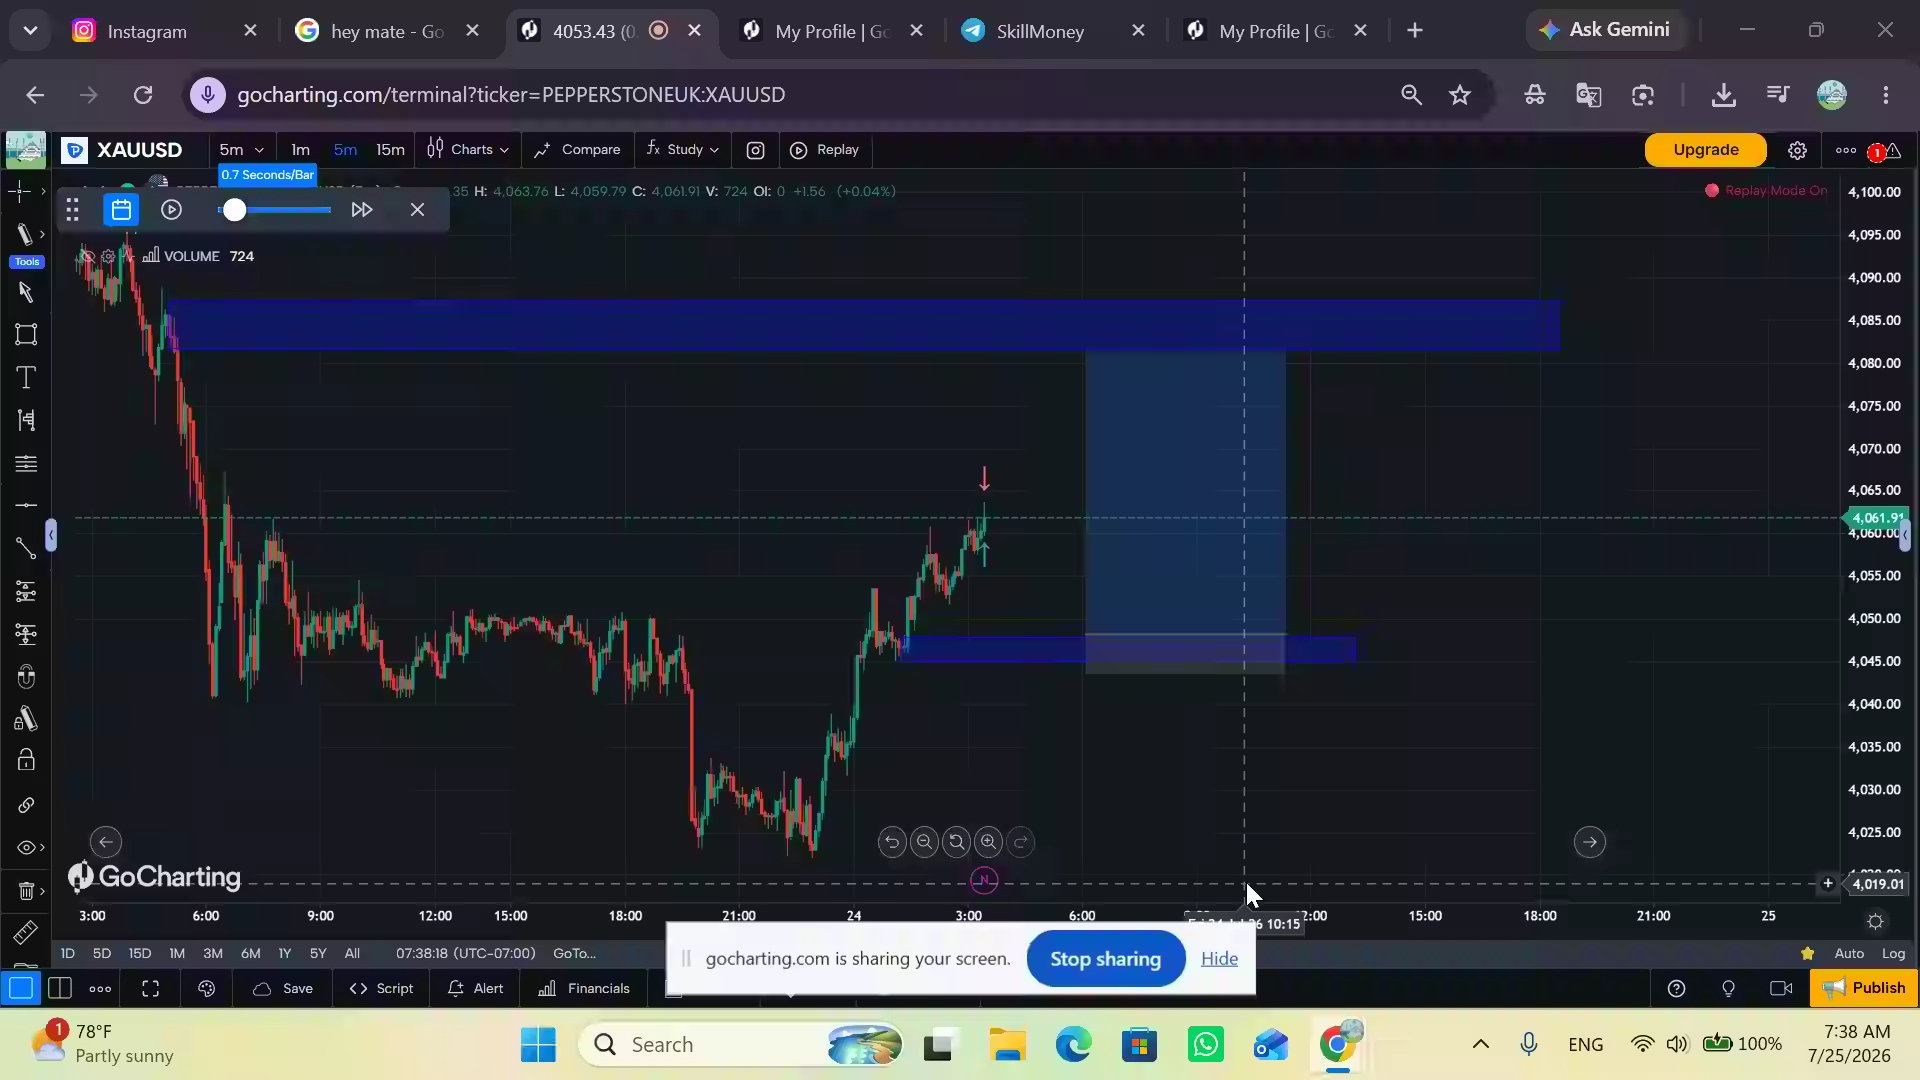
Look amazing
Look demand and supply Look demand and

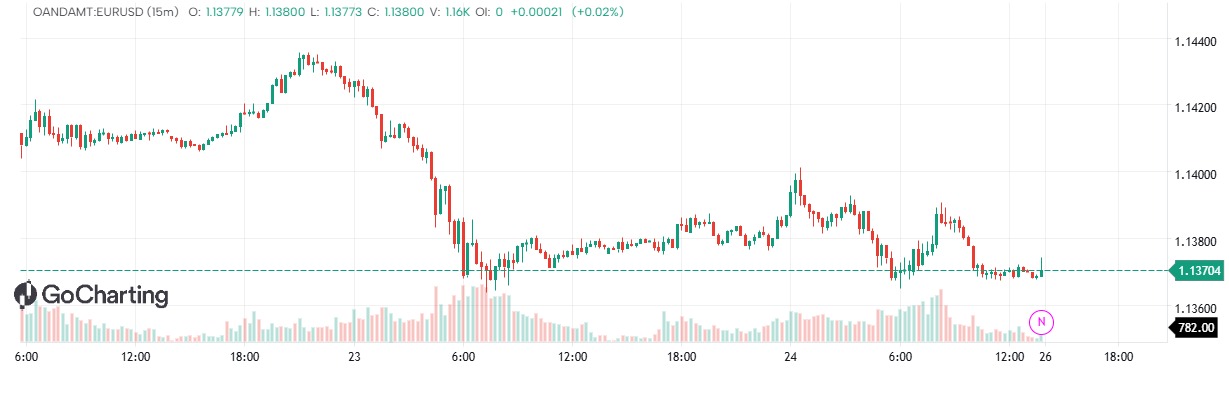
FXN Range For Backtesting
This indicator is useful for the determining the different sessions

 BullishNIFTY-I
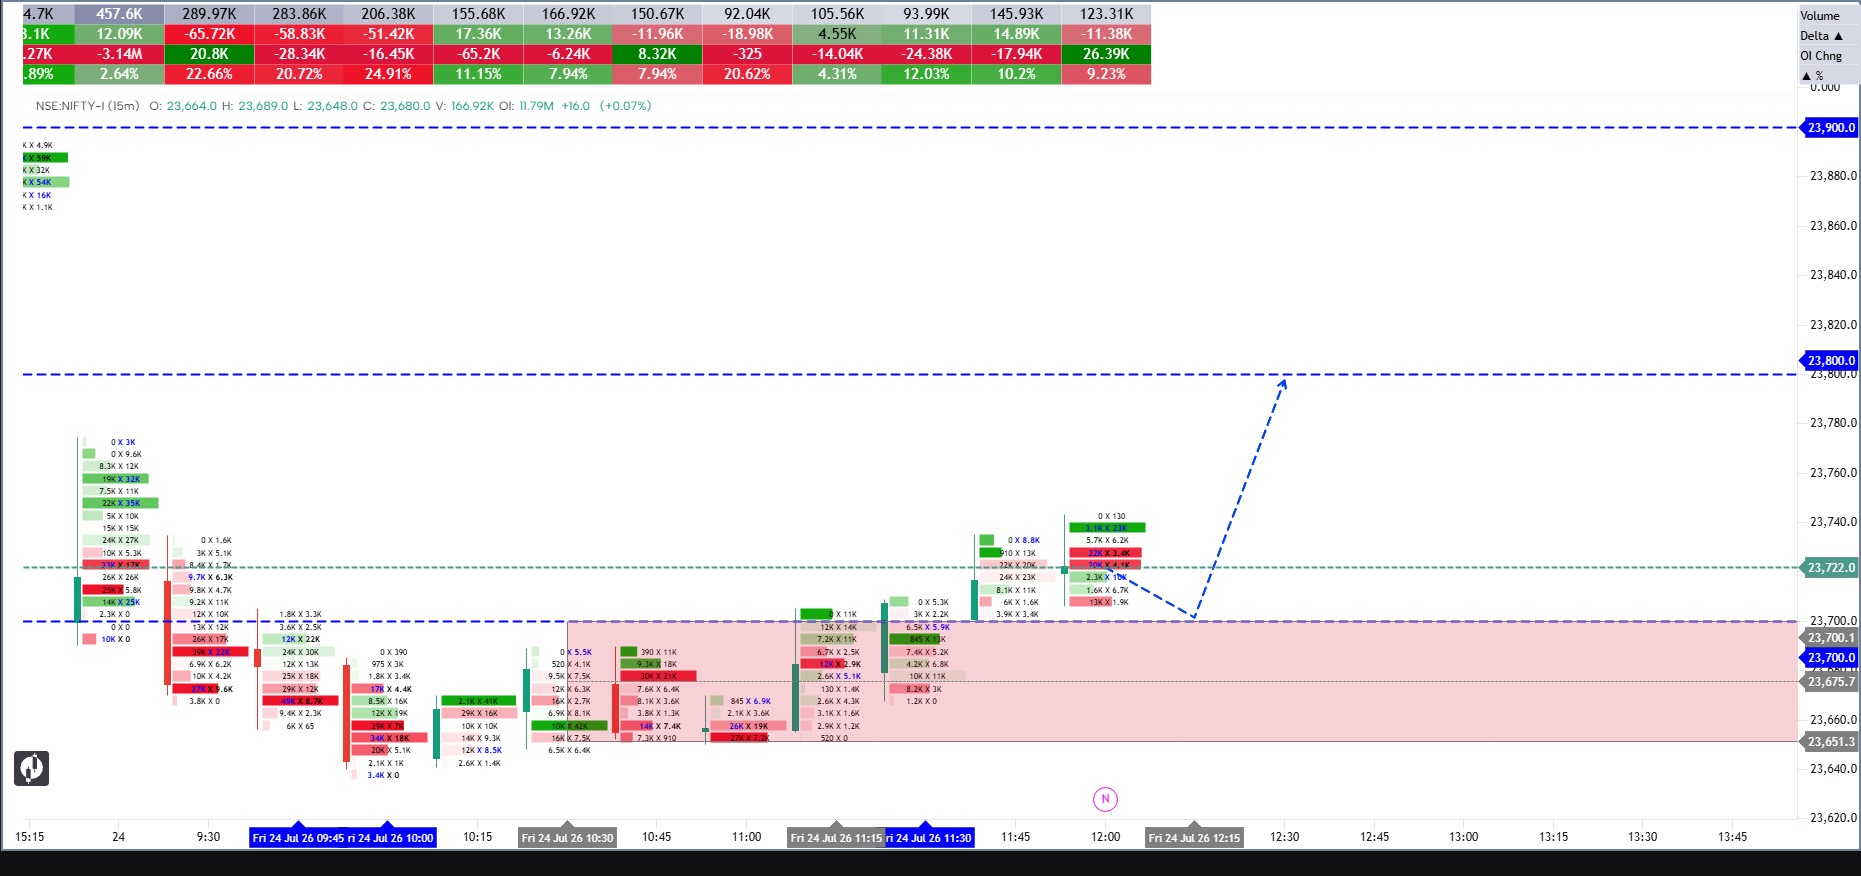
nifty 50 future
price enter at positive gamma regime. dealer hedging is buying at dip and selling at rise, 23800, 23900 is high positive gamma magnet , Price rotate through this zones. lower aggressive seller absorbed and buyer entering

 Neutral
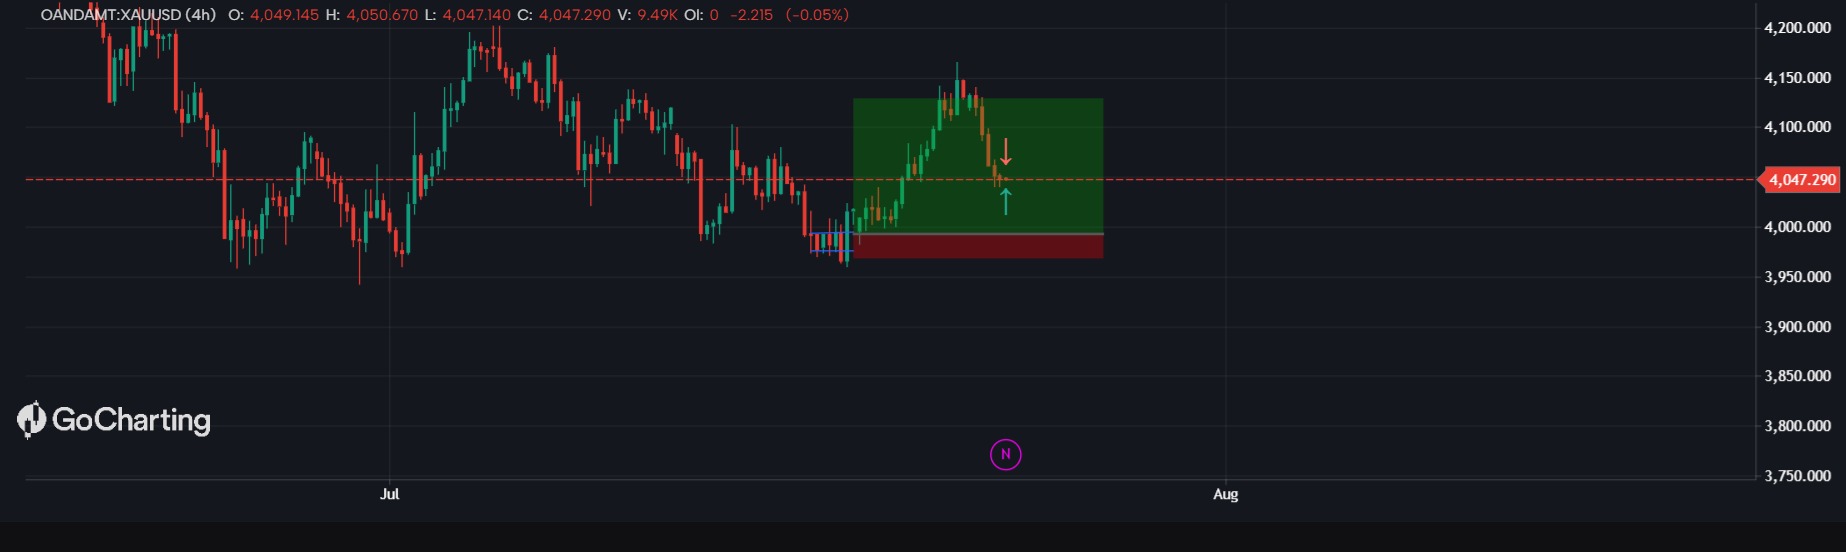
BEST SMC
THE BEST IND FOR ICT AND SMC FOR THE O DIVERGENCE ZONE BUY OR SELL ZONES TRY IT AND USE IT ON HTF And ltf ..........................................

 Bullish
 NVDA
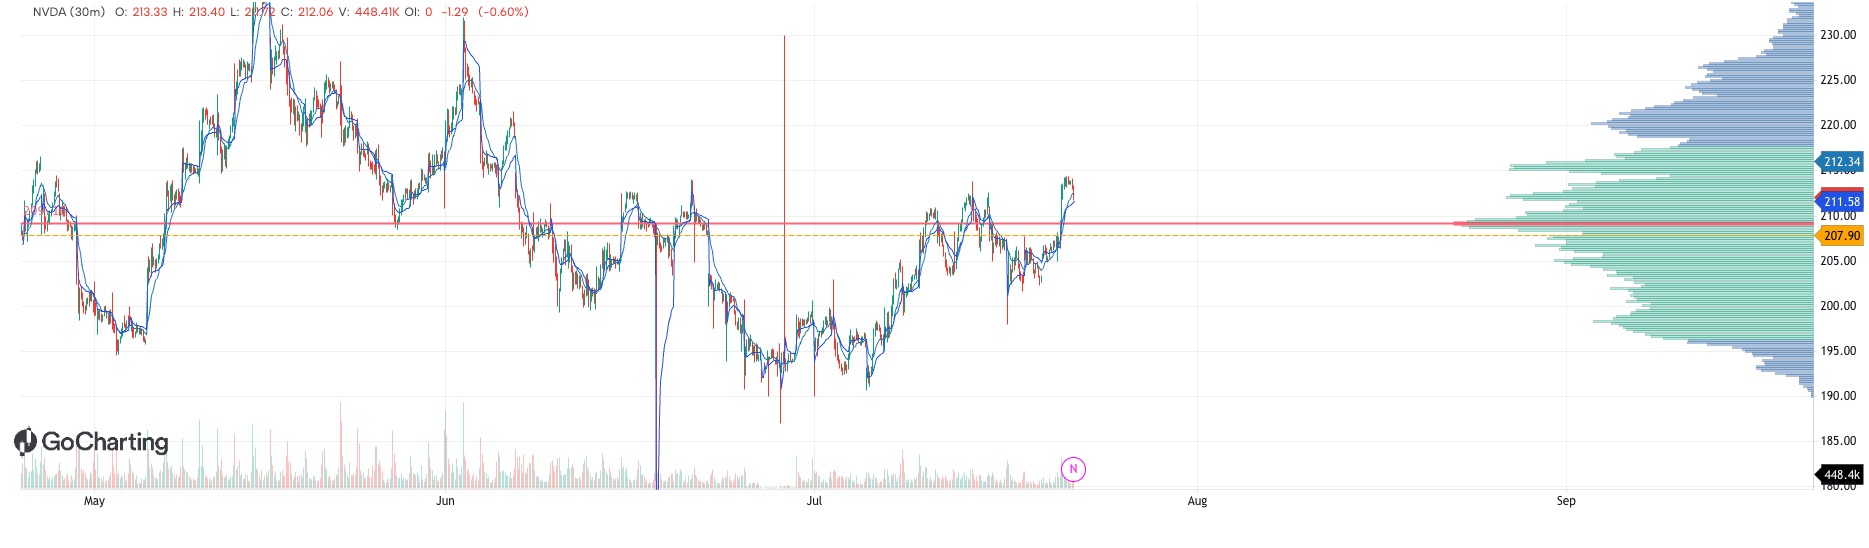
NVDAPrevious days highs and lows
Map previous days highs and lows and suse it to make your trades better. You can analyze key liquidity levels and see if they match up with volume profile or delta.

 neutralBSE
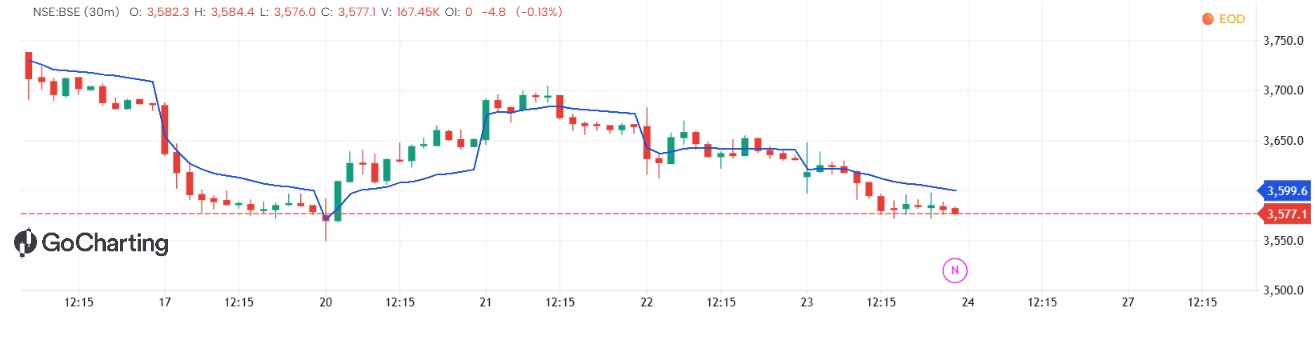
IFVG SIGNAL
IFVG BUY SELL SIGNAL INDICATOR MORE DESCRIPTION IFVG BUY SELL SIGNAL INDICATOR MORE DESCRIPTION IFVG BUY SELL SIGNAL INDICATOR MORE DESCRIPTION

 Neutral6EU26
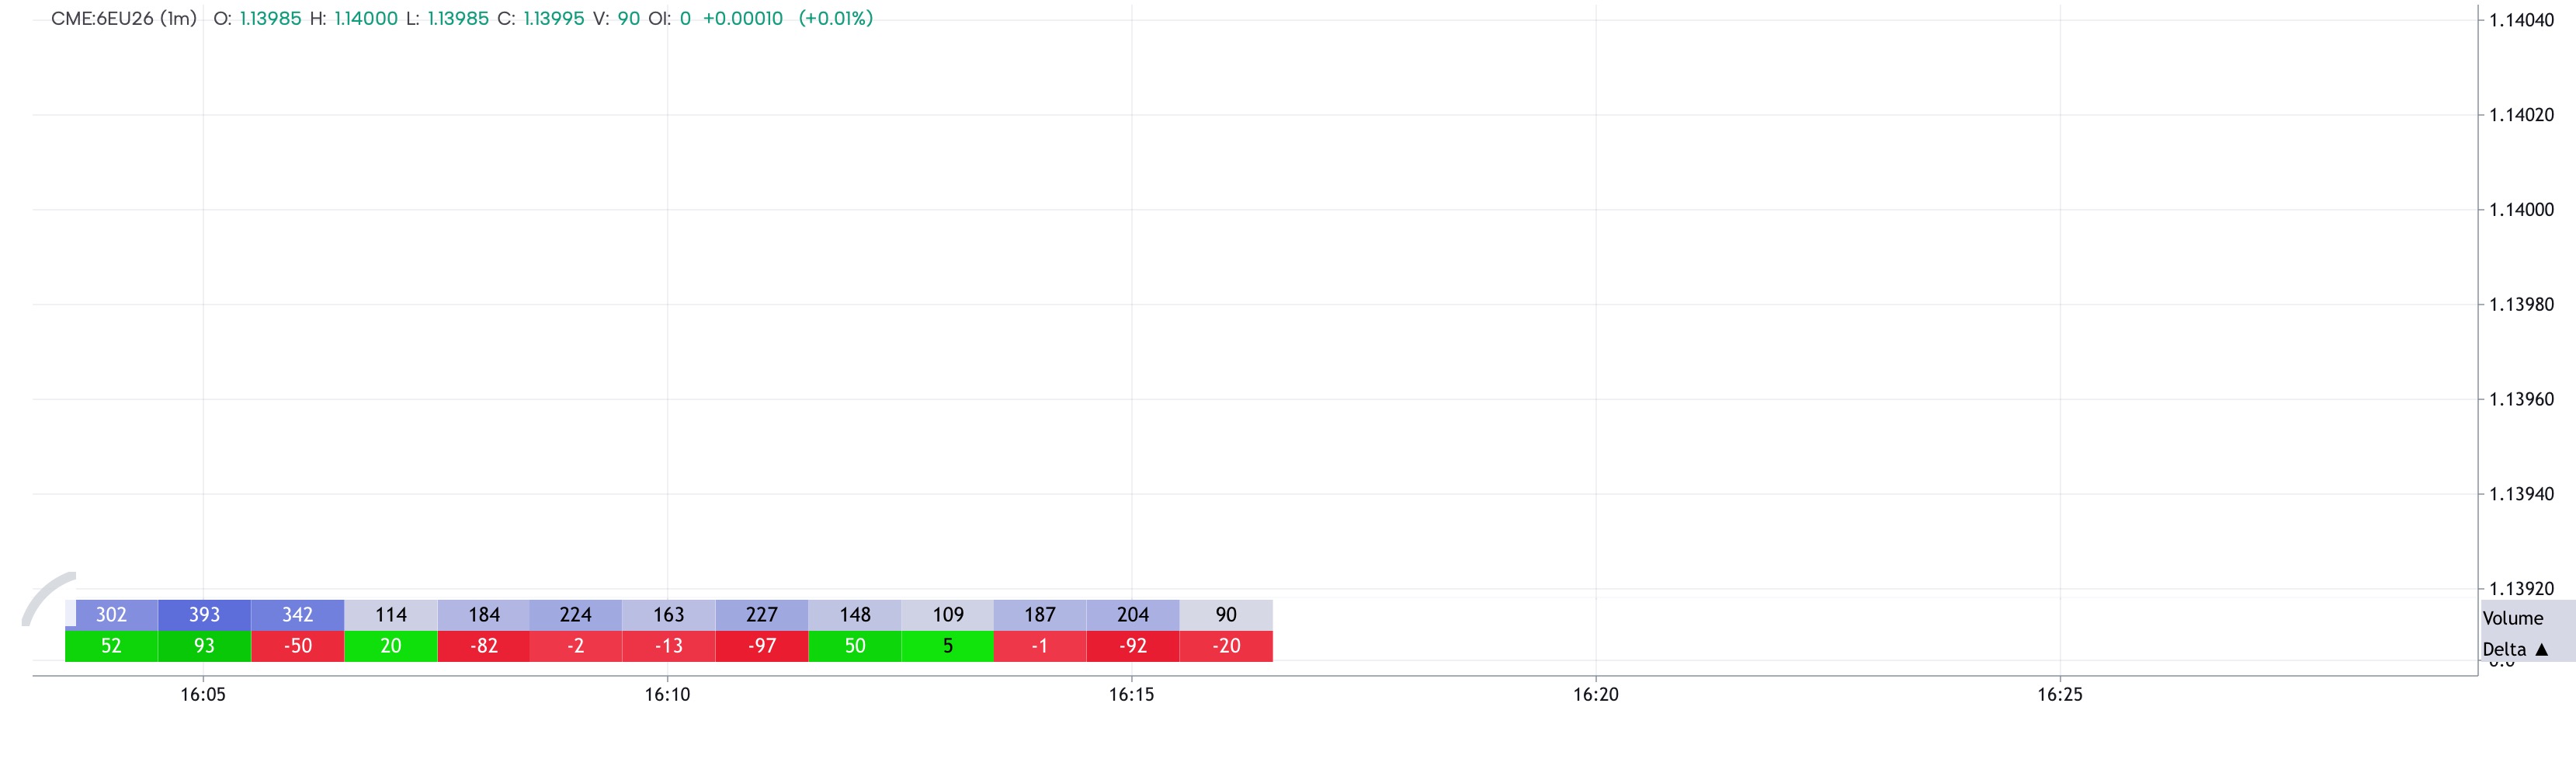
OrderFlow Radar PRO M1
Indicator privat pentru detectarea volumului mare pe OrderFlow, delta puternică, absorbție și sweep-uri pe grafic M1. Folosește buy volume, sell volume, delta și trades pentru a marca doar lumânările cu activitate instituțională neobișnuită.

 SUIUSDT
Sui ...
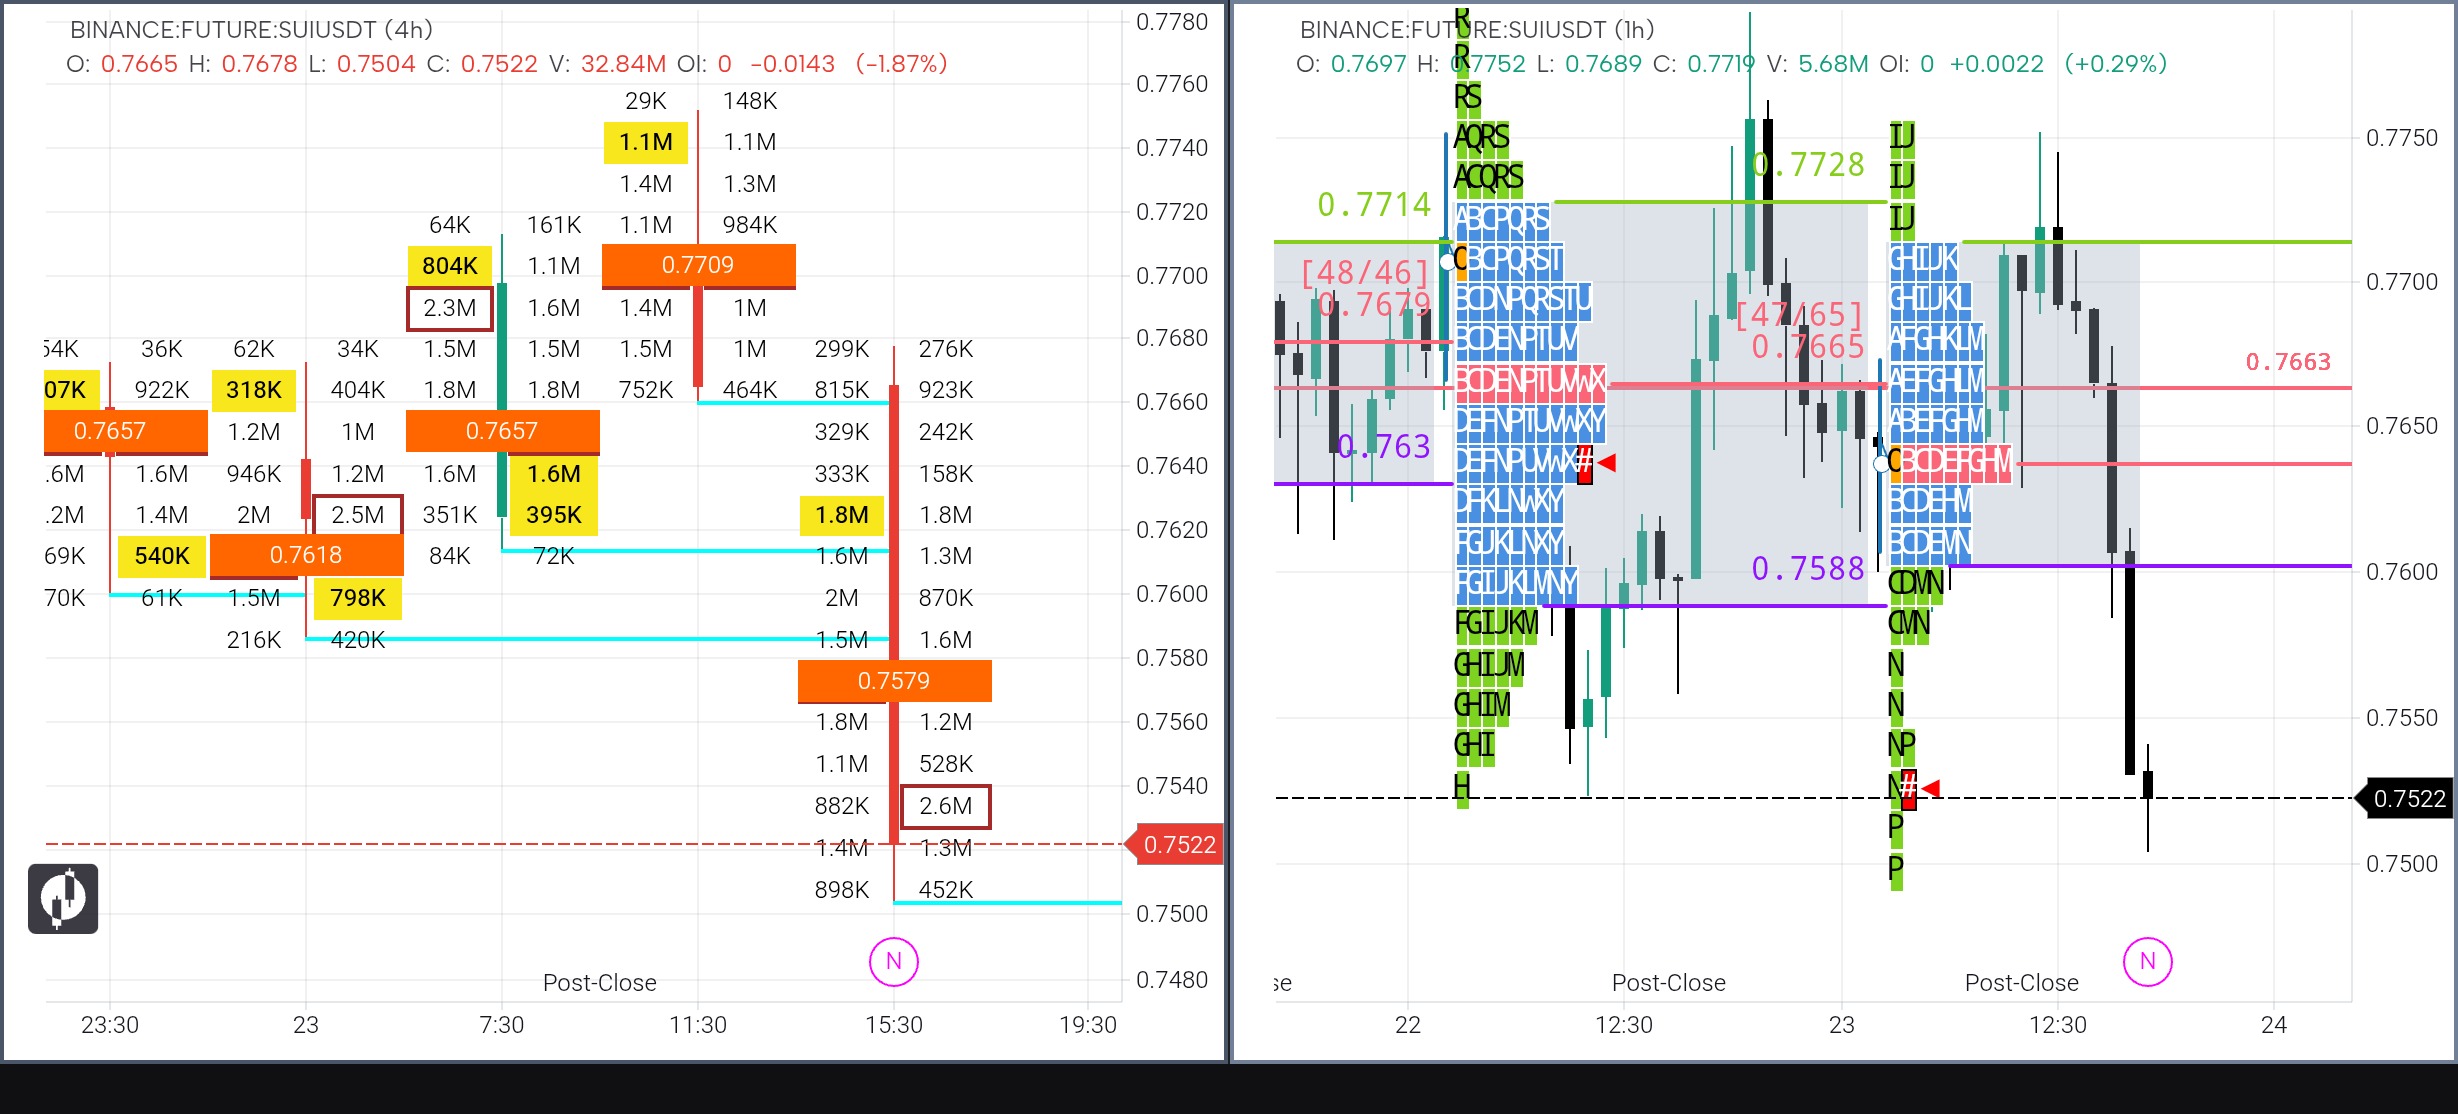
Headline: $SUI Market Update: Auction Dynamics & Order Flow Analysis 📊 The current structure on $SUI shows a classic “Trend Down” day following a failed auction at the top. Here’s the breakdown: 🔹 Market Profile (TPO): The right pane confirms a Double Distribution pattern. We’ve broken below the high-volume node (Value Area) and the ‘N’ period has extended the range lower. The POC (Point of Control) is shifting down, indicating sellers are in full control of the value migration. 🔹 Volume Footprint (4H): Imbalance & Aggression: Significant selling pressure is visible near the 0.7600 − 0.7600− 0.7650 zone (marked by orange/yellow blocks). Unfinished Auction: The lower tail shows high volume at the very edge (2.6M at $0.7530), suggesting the auction to the downside might not be finished yet. We need to see a “buying tail” or exhaustion to confirm a bottom. Key Level: 0.7522 0.7522isthecurrentbattleground.Afailuretoreclaim 0.7618 (previous high volume) keeps the bearish bias alive. Outlook: Bearish as long as price remains below the $0.7650 Value Area. Looking for a liquidity grab at lower support levels before any reversal play. #

 neutralICICIGI
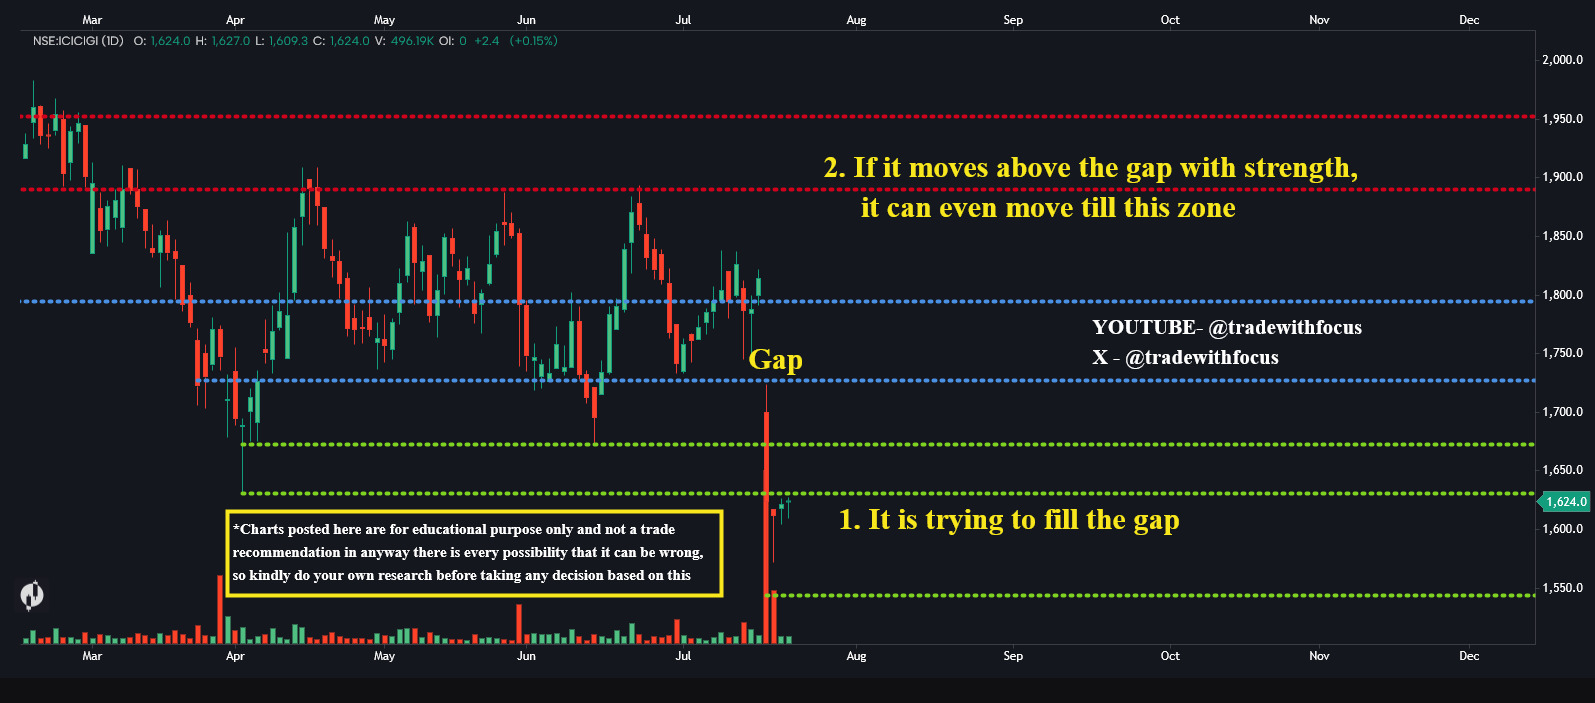
GAP
1. It is trying to fill the gap 2. If it moves above the gap with strength, it can even move till this zone
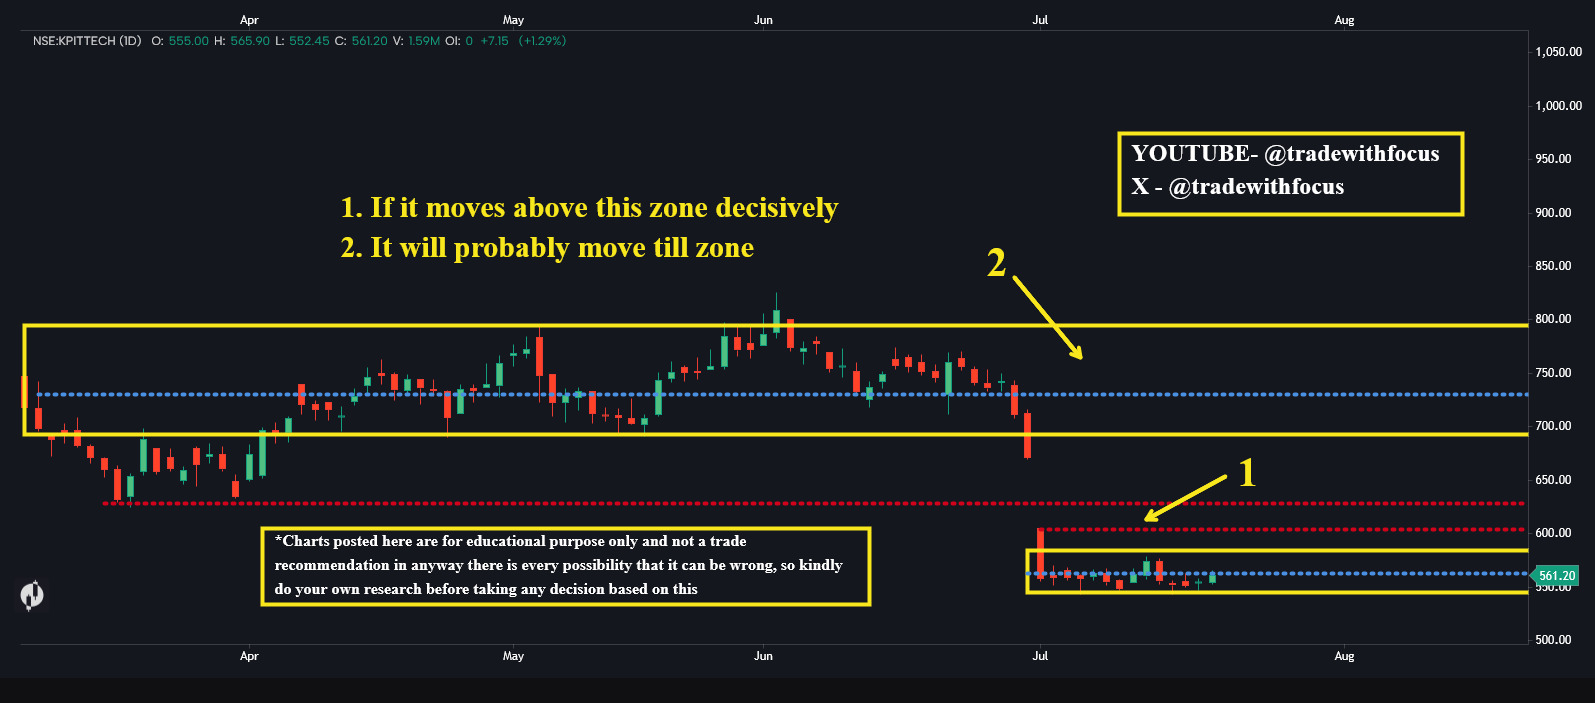 neutralKPITTECH
CONSOLIDATION
1. If it moves above this zone decisively 2. It will probably move till zone
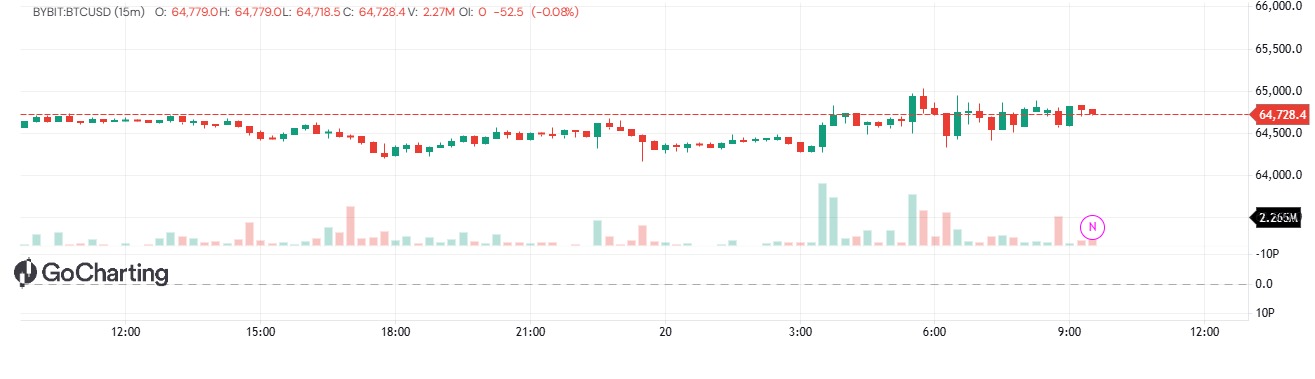 neutralBTCUSD
Best Buy and Sell Indicator
Here are a few short, unique descriptions you can use for a Buy & Sell indicator: "Advanced AI-inspired Buy & Sell indicator delivering high-probability trade signals with trend confirmation and reduced market noise." "Spot powerful market reversals with precise Buy & Sell signals designed for intraday, swing, and positional trading." "A smart trading indicator that combines trend, momentum, and price action to identify the best entry and exit opportunities." "Trade with confidence using reliable Buy & Sell alerts, dynamic trend filtering, and real-time market analysis." "Professional-grade Buy & Sell indicator built to help traders capture strong trends while avoiding false signals." "Simple, fast, and accurate—providing clear Buy & Sell signals across stocks, forex, crypto, and indices." "Maximize your trading potential with intelligent Buy & Sell signals, trend detection, and risk-aware market insights." Recommended version:"Best Buy & Sell Indicator – A powerful trend-following tool that combines momentum, price action, and smart filtering to deliver accurate Buy & Sell signals with minimal false alerts. Perfect for Stocks, Options, Forex, Crypto, and Indices."

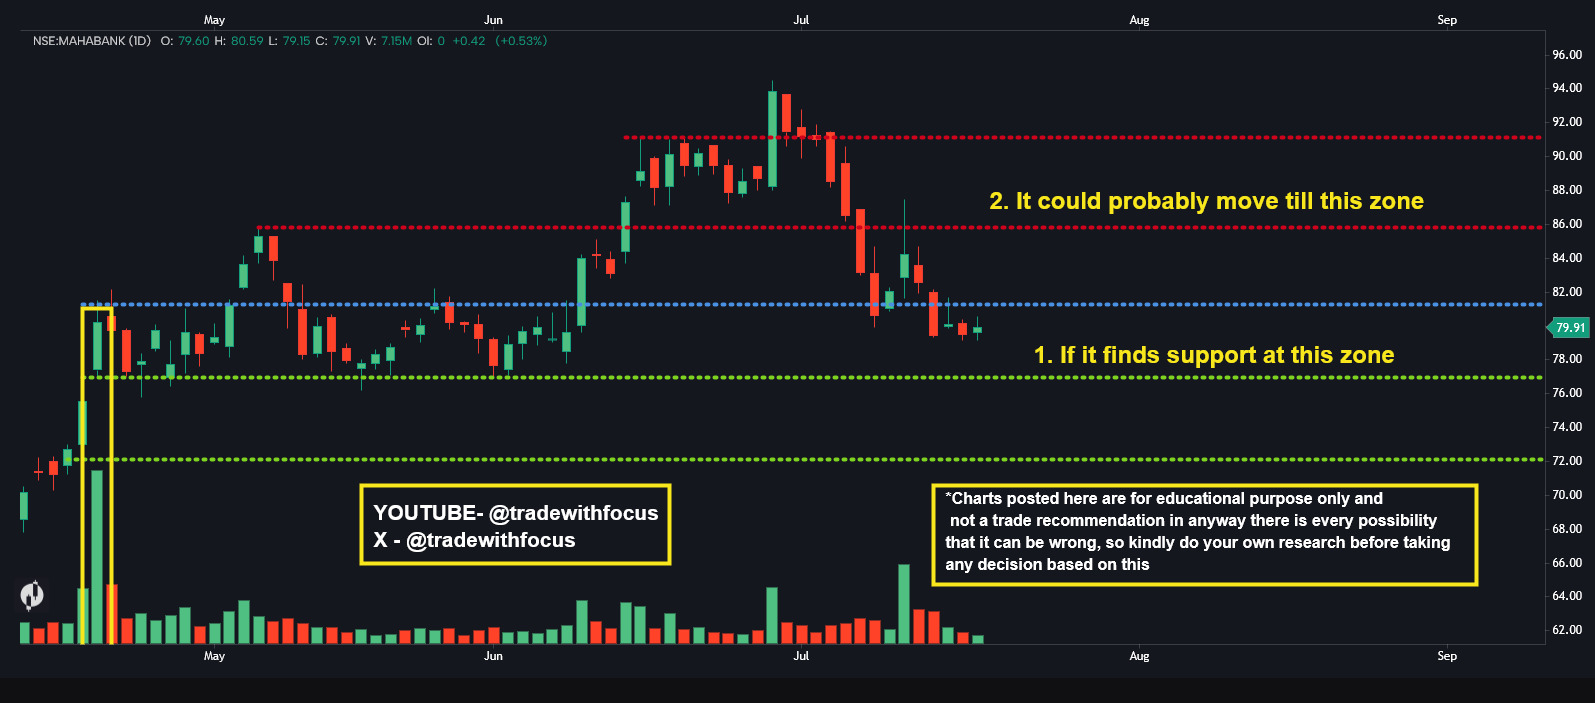 neutralMAHABANK
SUPPORT ZONE
1. If it finds support at this zone 2. It could probably move till this zone
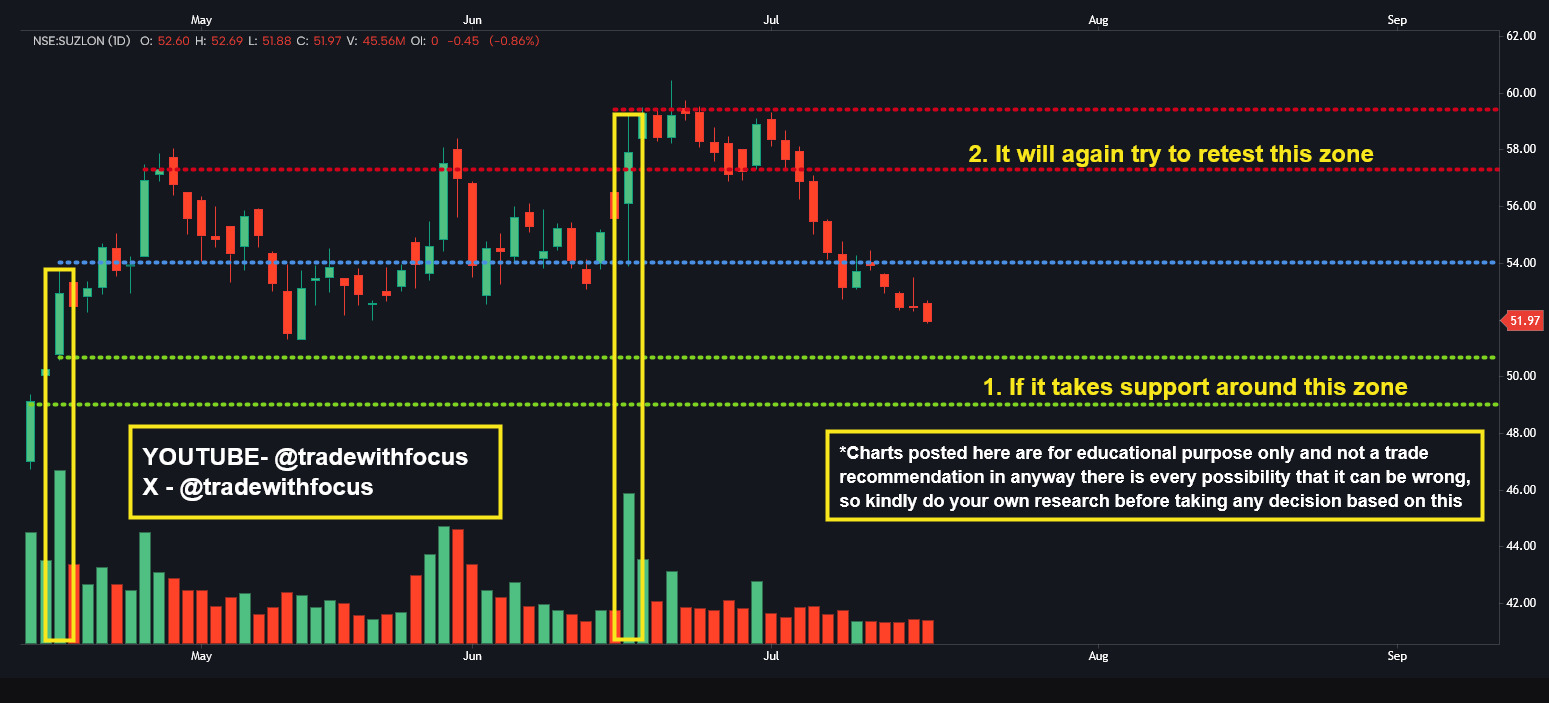 neutralSUZLON
Retest
1.. If it takes around this zone 2. It will again try to retest this zone
 Bearish
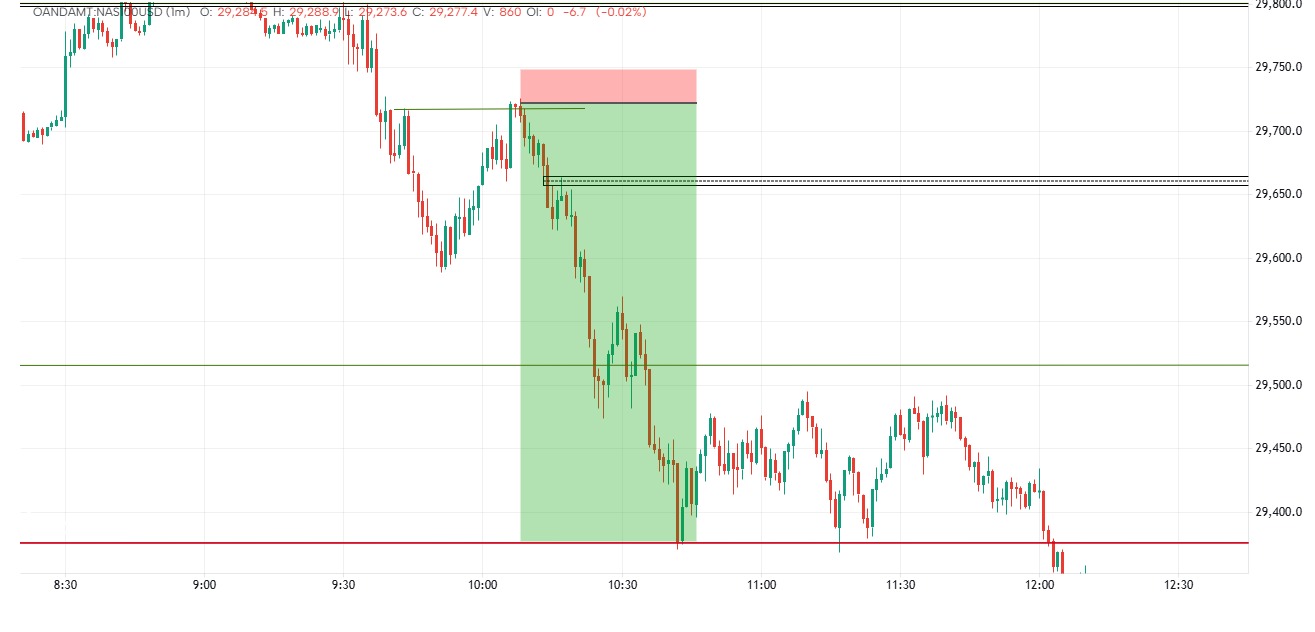
DONE DEAL
A verry clean setup to go with the previous trend. follow the account and like for more updates🙏

 ETHUSDT
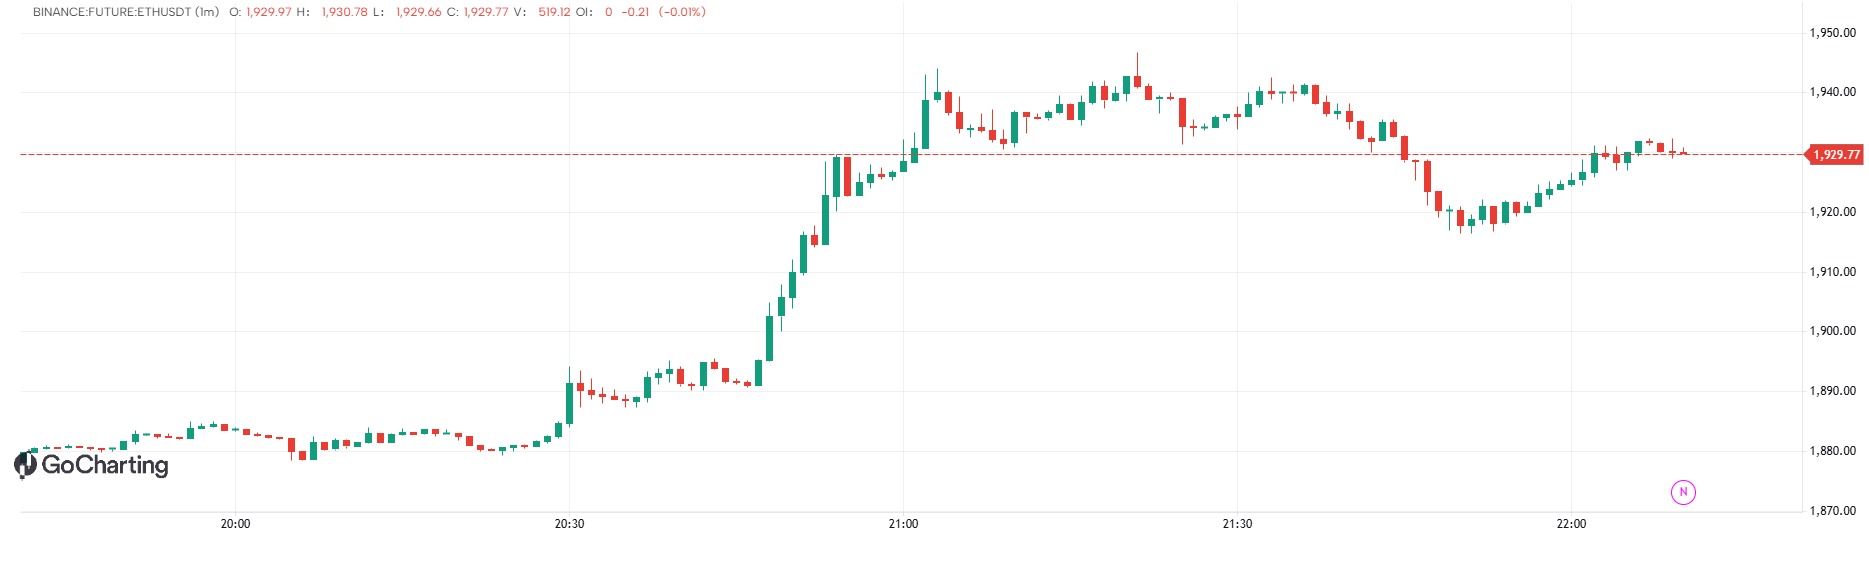
脚本
//@version=5 indicator("好用趋势信号脚本 v2", overlay=true, max_labels_count=500) // ==================== 均线 ==================== ema20 = ta.ema(close, 20) ema50 = ta.ema(close, 50) ema200 = ta.ema(close, 200) plot(ema20, color=color.blue, linewidth=2, title="EMA20") plot(ema50, color=color.purple, linewidth=2, title="EMA50") plot(ema200, color=color.orange, linewidth=2, title="EMA200") // ==================== SuperTrend ==================== factor = input.float(3.0, "SuperTrend 因子", step=0.1) period = input.int(10, "SuperTrend 周期") [supertrend, direction] = ta.supertrend(factor, period) plot(supertrend, color = direction == -1 ? color.green : color.red, linewidth=3, title="SuperTrend") // ==================== MACD ==================== [macdLine, signalLine, _] = ta.macd(close, 12, 26, 9) macdCrossUp = ta.crossover(macdLine, signalLine) macdCrossDown = ta.crossunder(macdLine, signalLine) // ==================== 买卖信号 ==================== buySignal = macdCrossUp and close > ema20 and direction == -1 sellSignal = macdCrossDown and close < ema20 and direction == 1 plotshape(buySignal, title="买入信号", location=location.belowbar, color=color.green, style=shape.triangleup, size=size.large) plotshape(sellSignal, title="卖出信号", location=location.abovebar, color=color.red, style=shape.triangledown, size=size.large) // 背景颜色提示 bgcolor(buySignal ? color.new(color.green, 90) : na) bgcolor(sellSignal ? color.new(color.red, 90) : na)

 BTCUSD
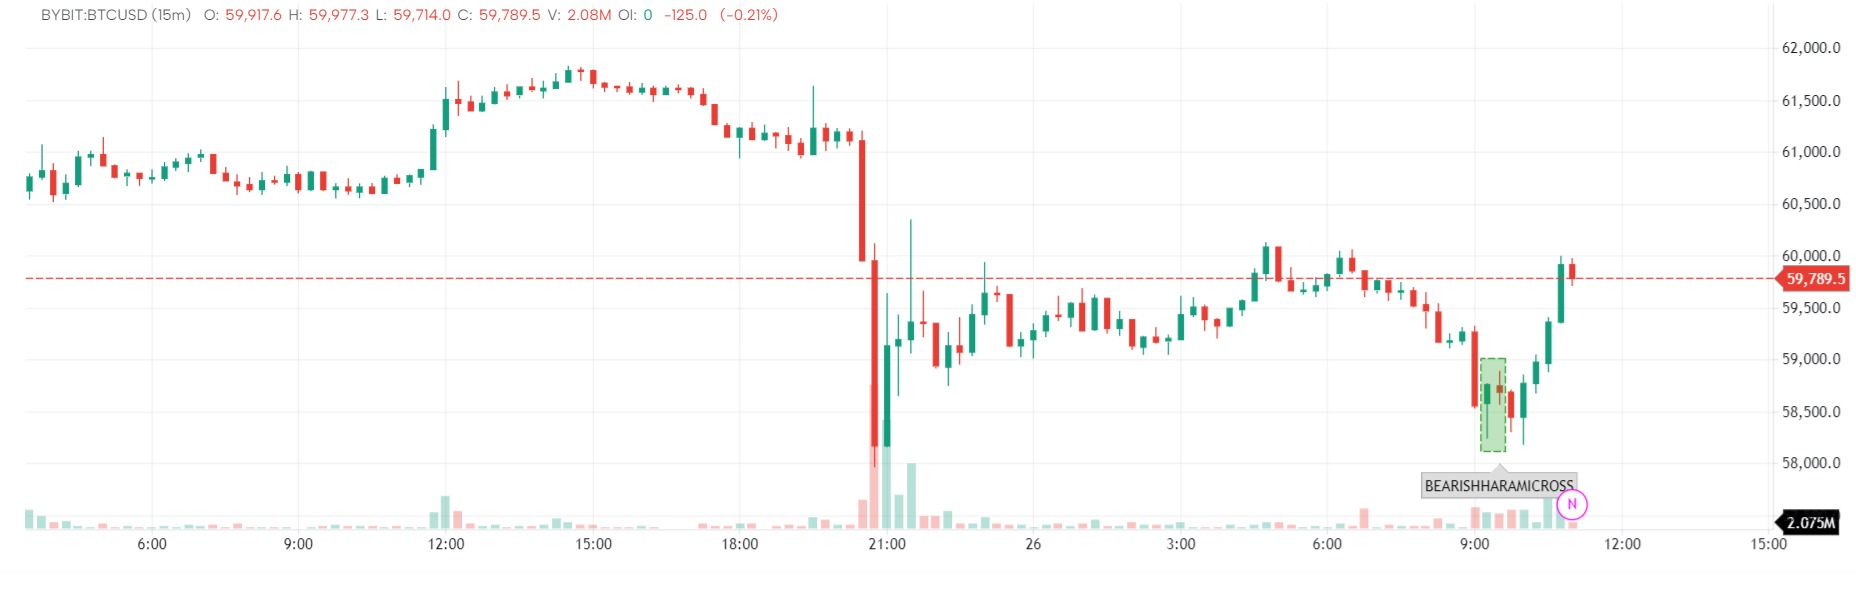
RSI EMA WMA
// This work is licensed under a Attribution-NonCommercial-ShareAlike 4.0 International (CC BY-NC-SA 4.0) https://creativecommons.org/licenses/by-nc-sa/4.0/ // © LuxAlgo //@version = 4 study(title=" Support and Resistance Levels with Breaks",shorttitle = " Support and Resistance Levels with Breaks [LuxAlgo]", overlay = true , max_bars_back=1000) // toggleBreaks = input(true, title = "Show Breaks" ) leftBars = input(15, title = "Left Bars ") rightBars = input(15, title = "Right Bars") volumeThresh = input(20, title = "Volume Threshold") // highUsePivot = fixnan(pivothigh(leftBars, rightBars)[1]) lowUsePivot = fixnan(pivotlow(leftBars, rightBars)[1]) r1 = plot(highUsePivot, color=change(highUsePivot) ? na : #FF0000, linewidth=3, offset=-(rightBars+1), title="Resistance") s1 = plot(lowUsePivot, color=change(lowUsePivot) ? na : #233dee, linewidth=3, offset=-(rightBars+1), title="Support") //Volume % short = ema(volume, 5) long = ema(volume, 10) osc = 100 * (short - long) / long //For breaks with volume plotshape(toggleBreaks and crossunder(close,lowUsePivot) and not (open - close volumeThresh, title = "Break", text = 'B', style = shape.labeldown, location = location.abovebar, color= color.red,textcolor = color.white, transp = 0, size = size.tiny) plotshape(toggleBreaks and crossover(close,highUsePivot ) and not(open - low > close - open) and osc > volumeThresh, title = "Break", text = 'B', style = shape.labelup, location = location.belowbar, color= color.green,textcolor = color.white, transp = 0, size = size.tiny) //For bull / bear wicks plotshape(toggleBreaks and crossover(close,highUsePivot ) and open - low > close - open , title = "Break", text = 'Bull Wick', style = shape.labelup, location = location.belowbar, color= color.green,textcolor = color.white, transp = 0, size = size.tiny) plotshape(toggleBreaks and crossunder(close,lowUsePivot) and open - close volumeThresh , title = "Support Broken" , message = "Support Broken") alertcondition(crossover(close,highUsePivot) and osc > volumeThresh, title = "Resistance Broken" , message = "Resistance Broken")
